Light Band - Part 1
Last Updated: 2026-01-09
I am not sure if there is a common name for this effect:

But I will call it "light band" for now. It is essentially a light band moving across the target surface, and is commonly used to attract user's attention or to demonstrate material properties such as being shiny or reflective.
This series of posts will introduce a few ways to implement this effect in Unity using Shader Graph, and it gets more hacky (and more fun!) as it goes:
Using a light band texture, move it across the surface of the object (UV space)
Move the light band across the screen, masking it such that it is only visible on the target object (Screen space)
Use a program-generated light band in 2
This post is the first entry in the series. I will go through the 1st method - moving texture in UV space.
If you have a light band texture ready with you, the easiest way to implement is to sample it and apply it to the target object. By offsetting and rotating its UV, we can make the light band move however we want.
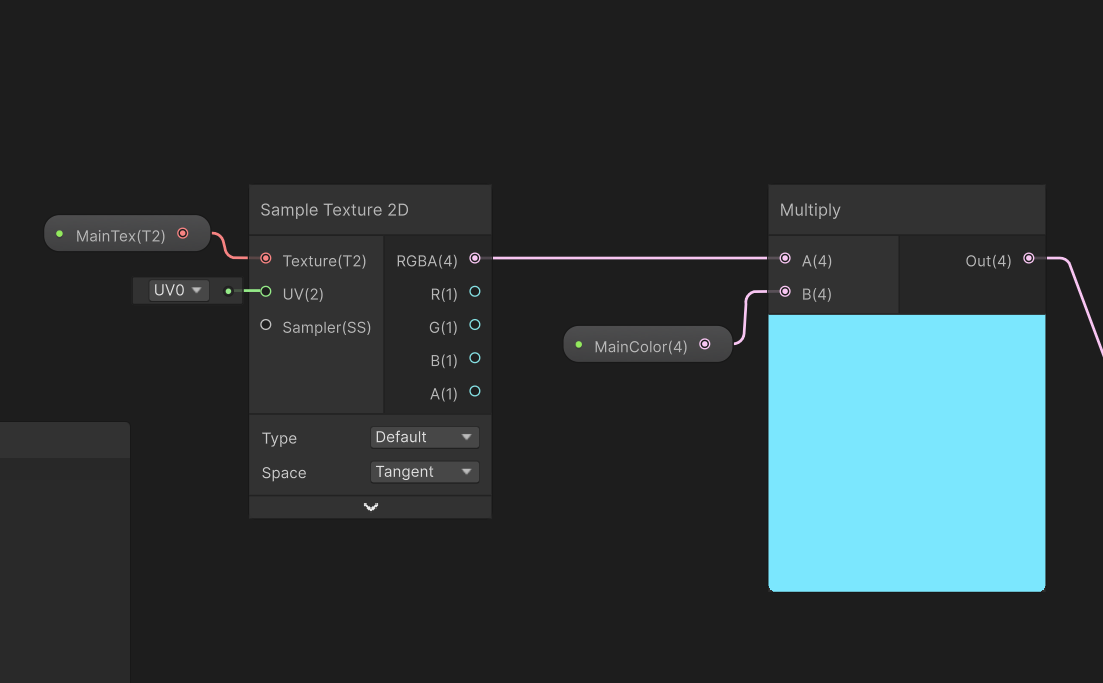
In our Shader Graph, we will first sample the base color of the target object. I used a simple Sample Texture 2D node, together with a optional MainColor variable:
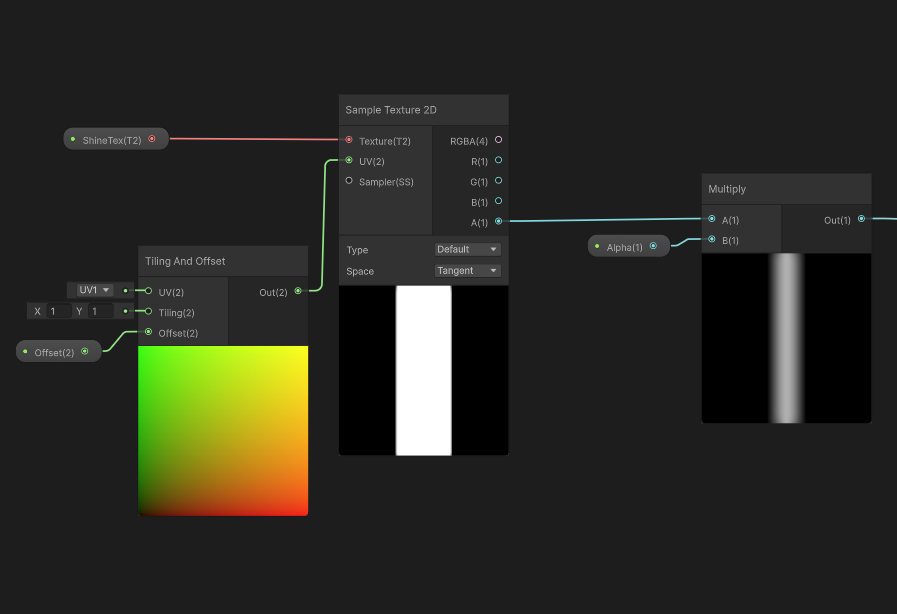
Next, we will sample the light band texture in pretty much the same way. I added an Alpha variable to control its transparency, and also added a Tiling and Offset node for later use:
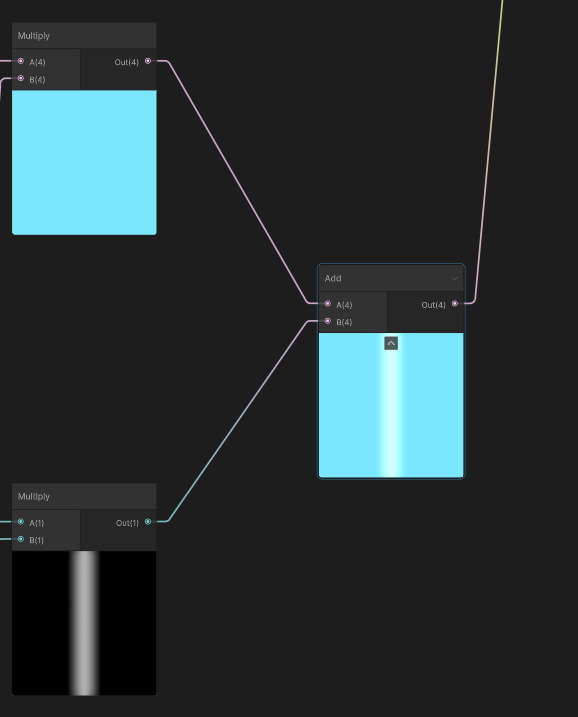
Having both colors, we can preview the effect. I added these 2 colors (you can experiement with other blending modes) to get a static look of the light band effect.
Remember the Tiling and Offset node we added just now? By adjusting offset, we can move the light band. I defined a Step variable to represent the "distance" the light band has traveled on the target object (0 to 1):
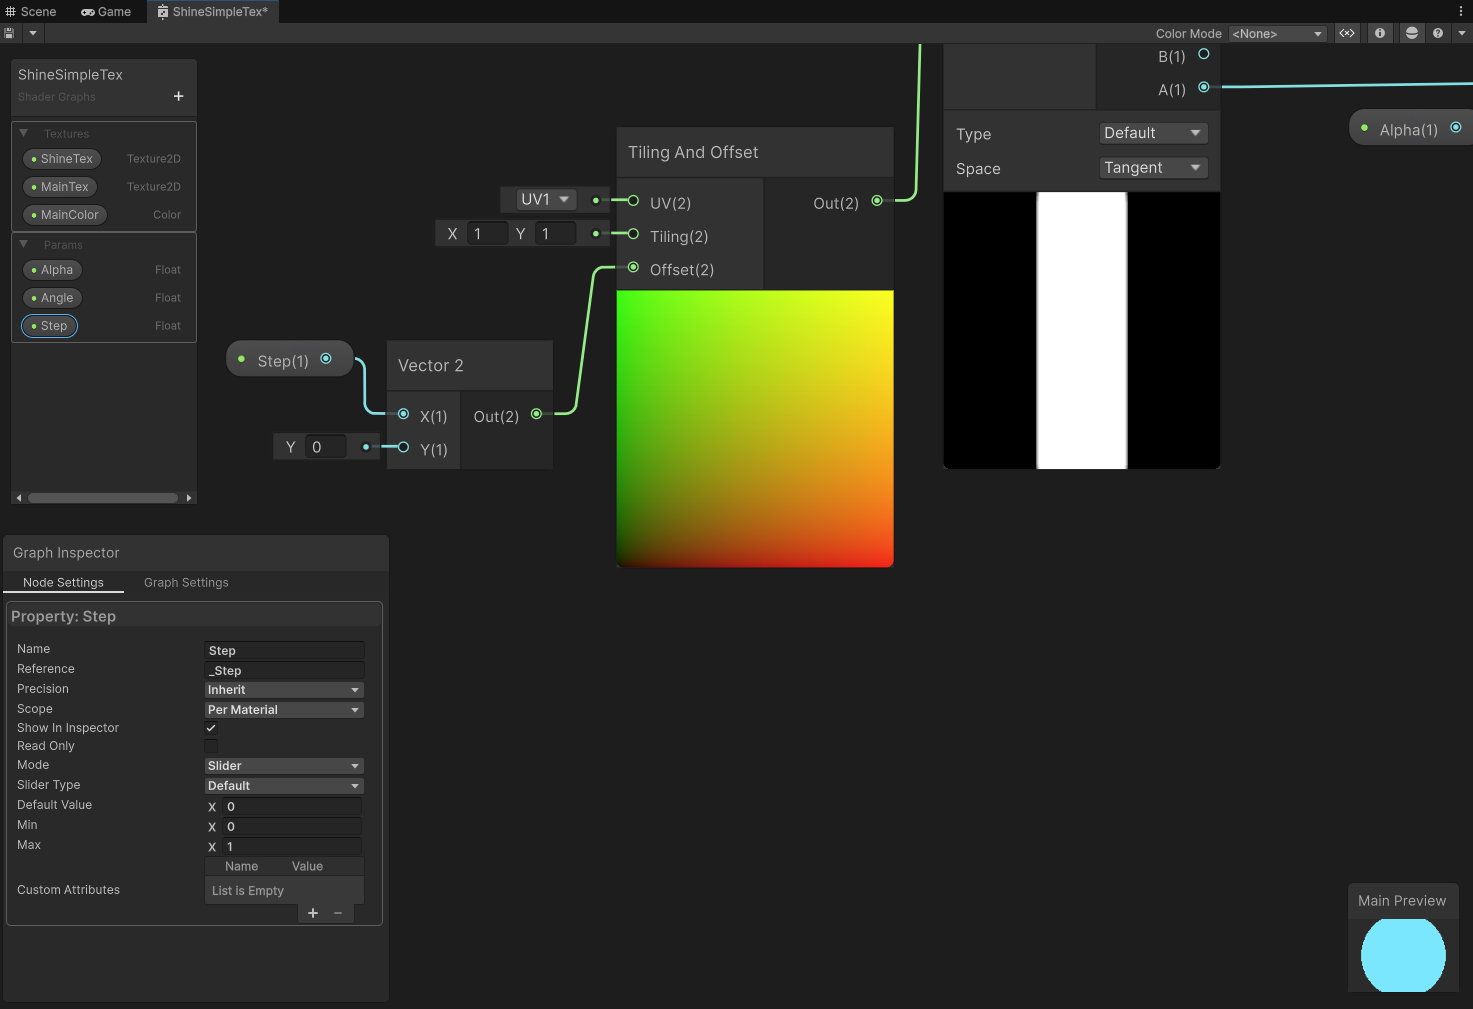
With a float variable selected, you can select Mode: Slider in the variable window to enable sliding control.
When Step changes, we can see the light band moving.
Most of the time we will also need to set the angle of the light band. Remember we just offsetted the UV? Turns out we can rotate it too. Here I defined an Angle variable, and connected it to the UV's Rotate node:
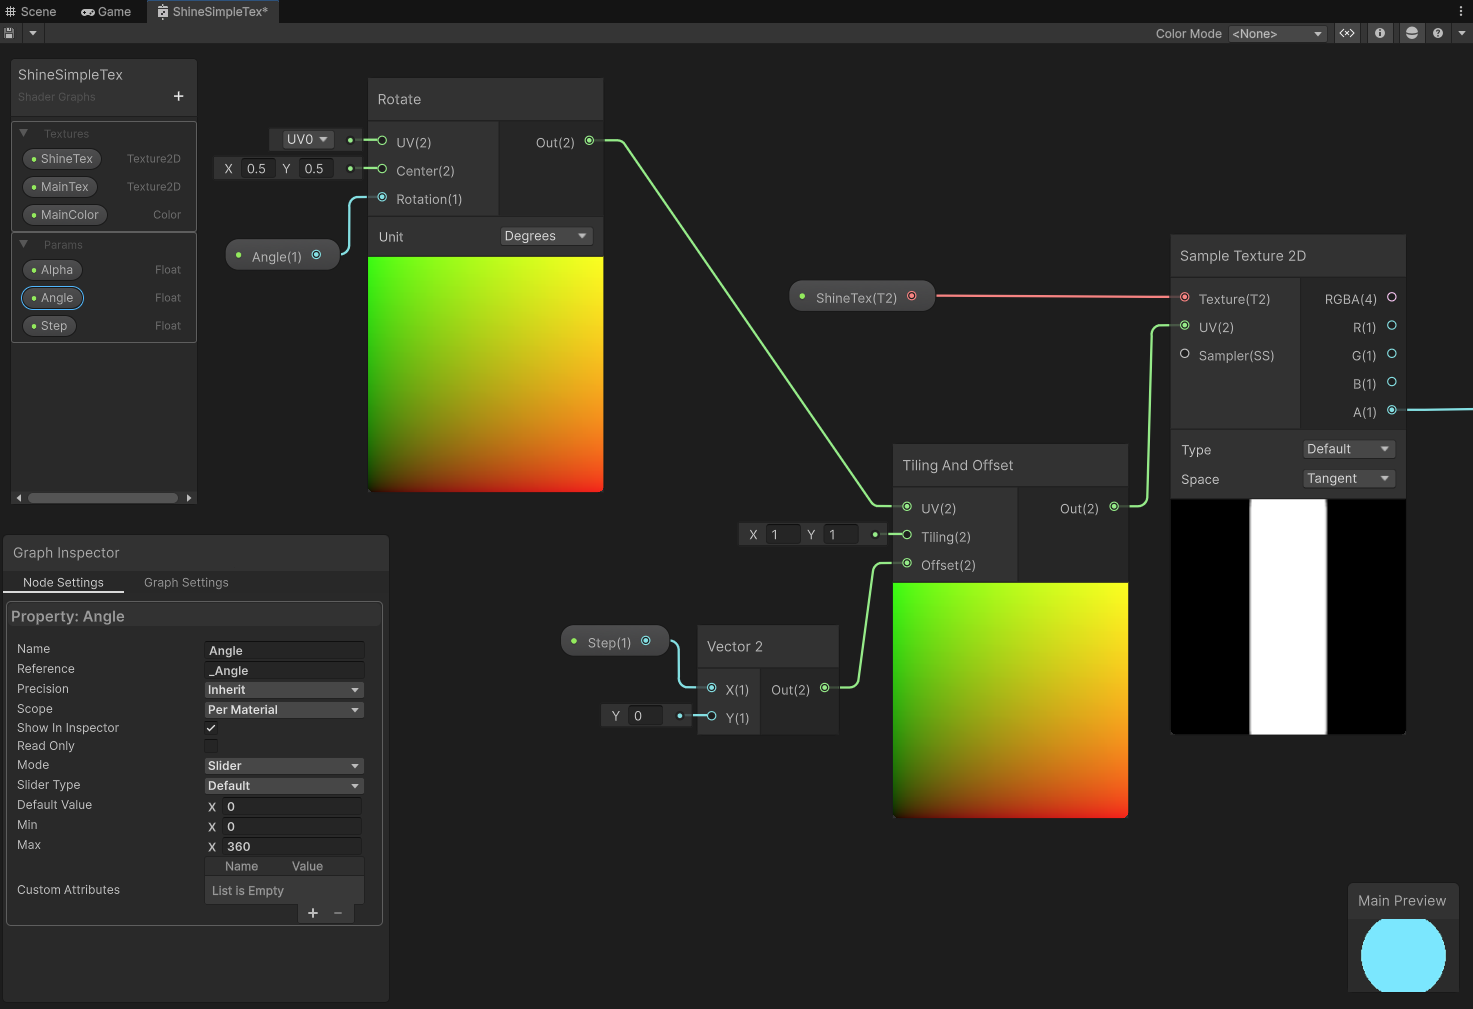
The rotated UV is then connected to the Tiling and Offset node from the previous step, allowing us to control the rotation of the light band.
The complete Shader Graph looks like this:
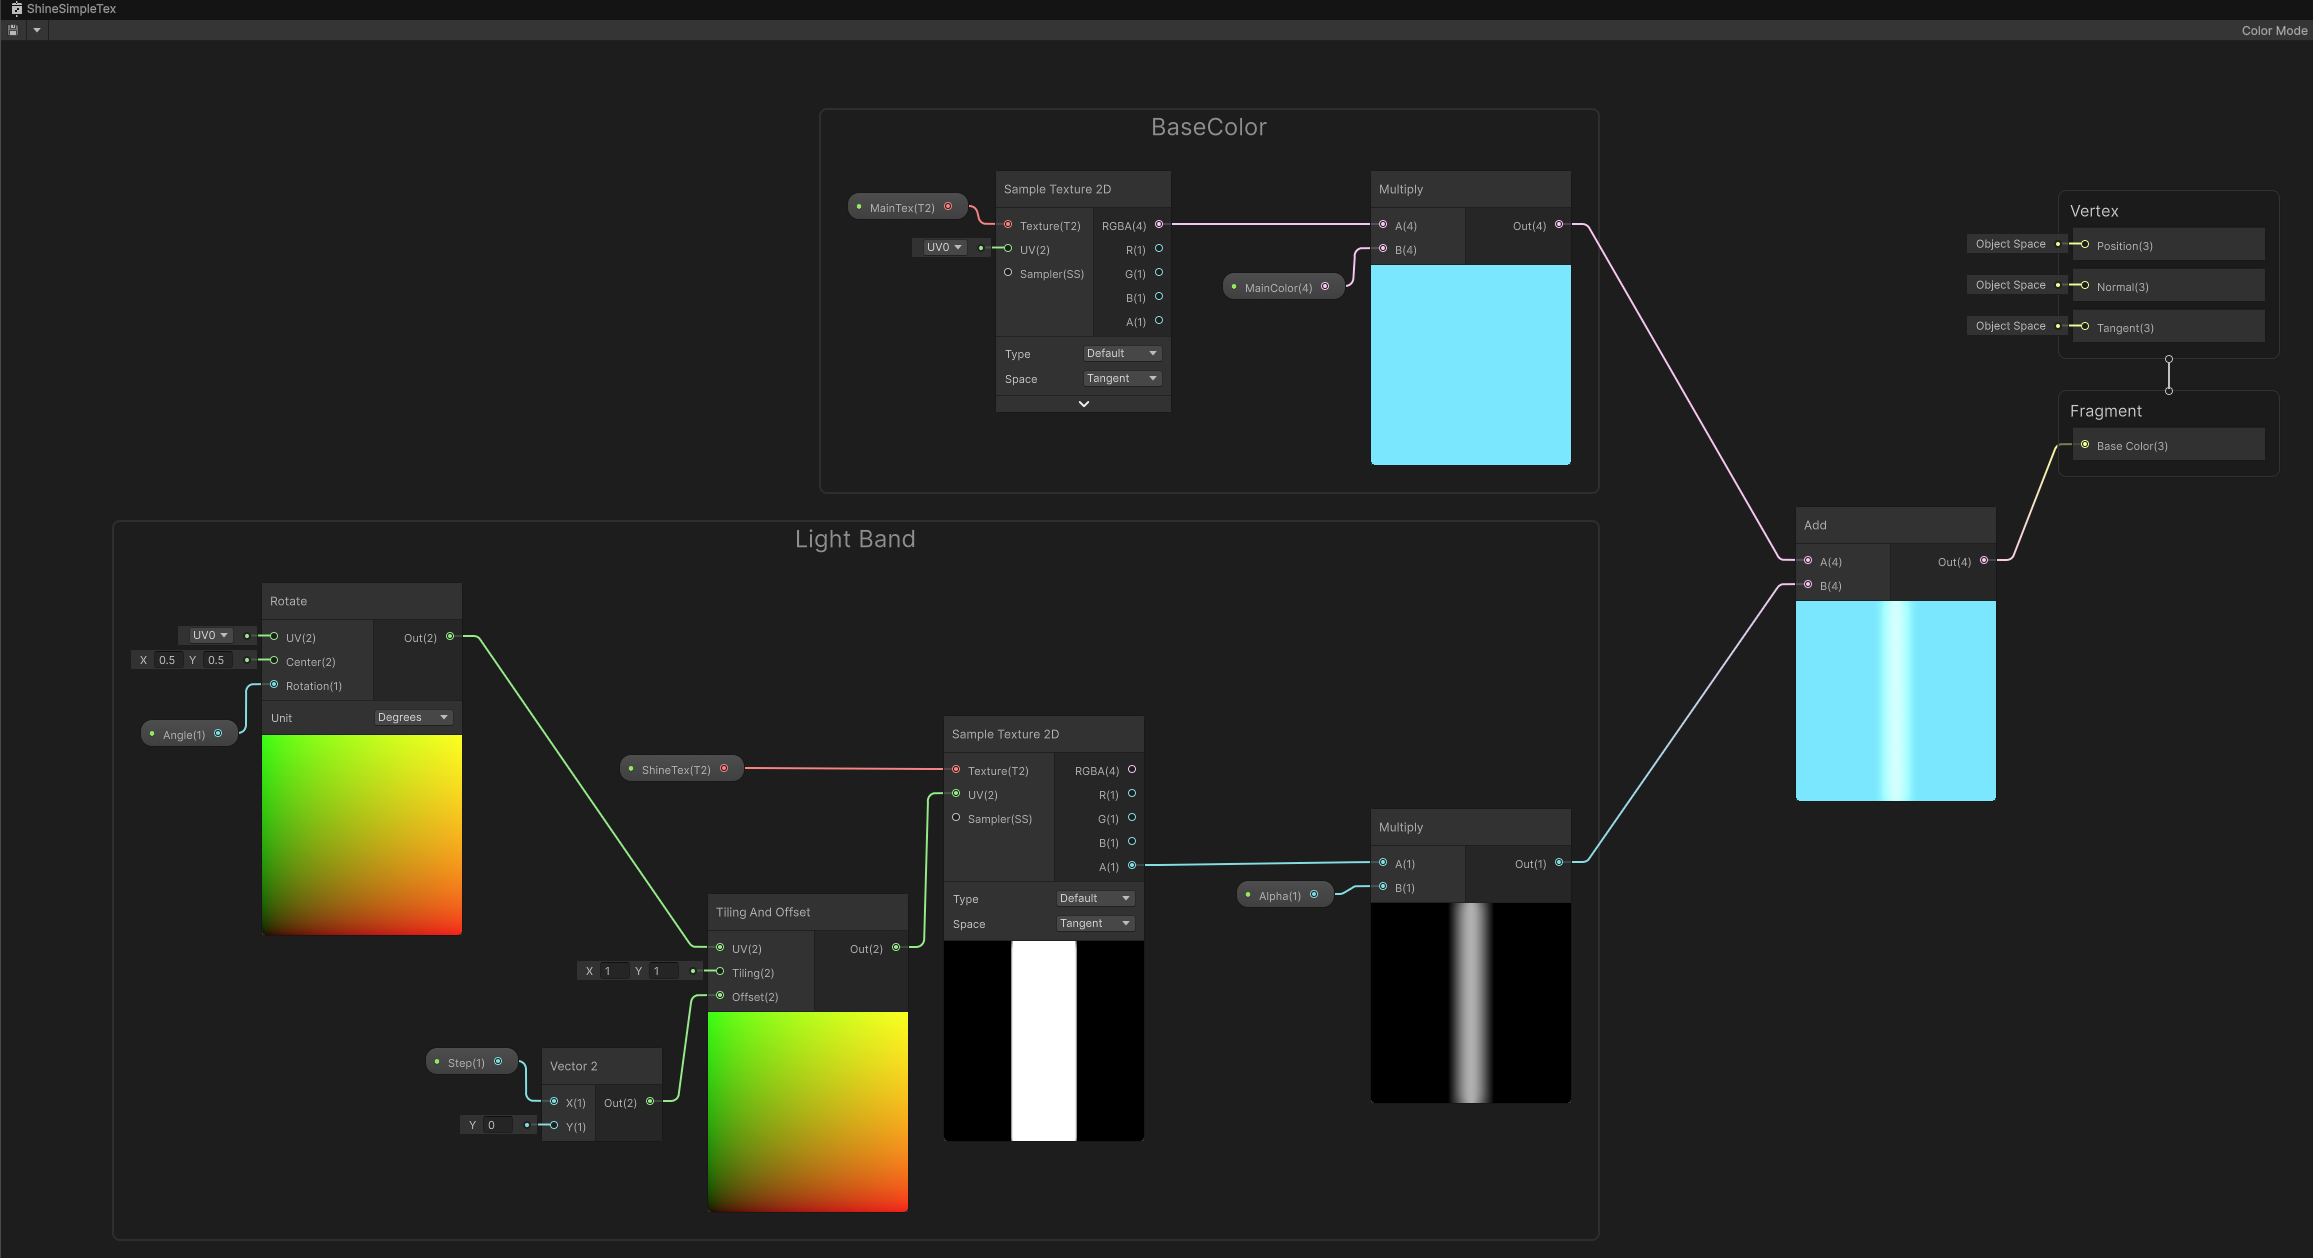
Simple, isn't it? But good enough most of the time.
However, due to the fact that everything here happens in UV space, it does have some limitations:
The rest of the posts in this series aim to address these limitations.